Age Transformation in python
We are going to explore a very interesting topic today in Python: age transformation. We will be using a very powerful deepfake model to seamlessly perform this transformation.
What is Age Transformation
Age transformation, in the context of computer vision and artificial intelligence, refers to the process of altering a person's appearance to look older or younger than they actually are. This is often achieved through the use of deep learning models, particularly a subset called Generative Adversarial Networks (GANs), which can generate highly realistic images by learning from a dataset of facial images.
These models are trained to recognize and modify key facial features that change with age, such as wrinkles, skin texture, hair color, and facial structure. The transformation can be applied to still images or videos, and the results can be surprisingly lifelike.
Age transformation technology has a variety of applications, including:
- Entertainment and Media: For creating younger or older versions of characters in movies and television without the need for makeup or casting different actors.
- Forensics and Law Enforcement: To update old photos in missing person cases, showing how the individual might look at a current age.
- Social Platforms: As a feature in social media apps, where users can alter their photos for fun to see how they might look at different ages.
- Age Progression Research: To study how aging affects the human face and to predict future changes in an individual's appearance.
The technology raises important ethical considerations, particularly concerning consent and the potential for misuse, such as creating deepfakes for deceptive purposes. Therefore, while the technology is impressive and has legitimate uses, it must be employed responsibly.
Getting Started
To kick off our project today, there are a few essentials we'll need to gather. First and foremost, we will require a Replicate API token, which will grant us access to the powerful models we intend to use. Additionally, it's crucial to have Python installed on your computer, as it will serve as the backbone for running our scripts and interfacing with the deep learning models. With these key components in place, we'll be well-equipped to dive into our age transformation endeavor.
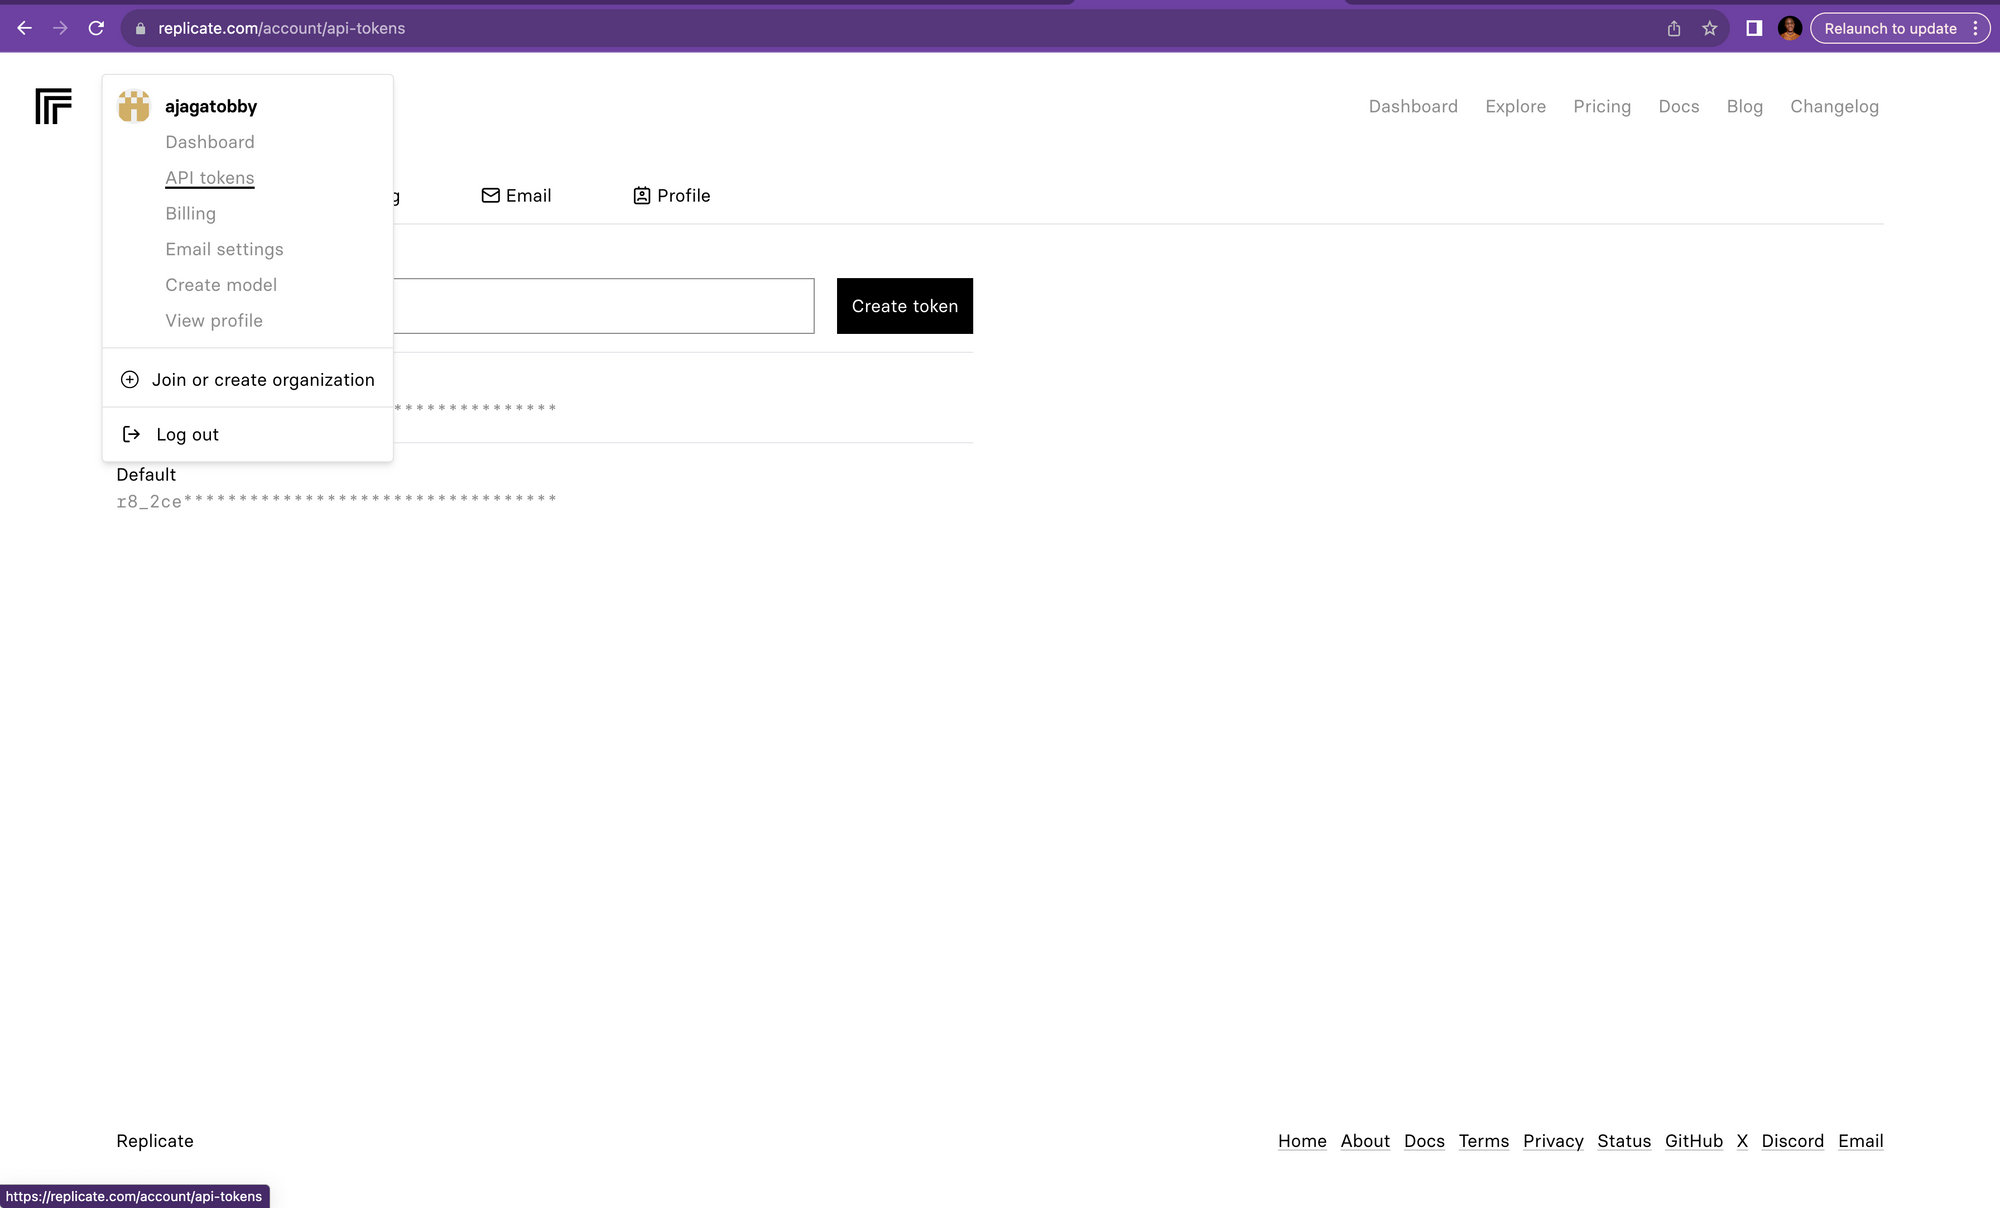
API Key
To obtain our API Key, we'll need to navigate to the Replicate website. Once there, click on the profile icon to access the dropdown menu and select the API Token option. Here, you'll find that an API key named Default has already been generated for you. You have the option to use this existing API key by copying it directly or, if you prefer, you can generate a new one by selecting the regenerate option. This key will be essential for authenticating our requests to the Replicate services in our upcoming project tasks.
Once we have secured our API Key, the next step is to launch our preferred coding environment. For the purposes of this tutorial, we will be utilizing Visual Studio Code (VS Code). This powerful and versatile editor is widely used among developers for its robust features and extensions that cater to a multitude of programming needs. If you haven't already installed VS Code, you can download it from the official website. After installation, open it up, and we will proceed to set up our project workspace for the age transformation task at hand.
Setting up project
Once you've launched Visual Studio Code, the first order of business is to configure our coding environment for the project. Begin by setting up two crucial files: a .env file for storing environment variables securely, and a main.py file which will contain our primary code.
In the .env file, you'll want to define an environment variable to store your Replicate API Token. This is done to keep sensitive information like API keys out of your main codebase, which is a best practice for security and maintainability. Create a new entry within the .env file as follows:
REPLICATE_API_TOKEN= YOUR_API_TOKEN_HERE
Replace Your-API-Token-Here with the actual API token you obtained from Replicate. This will allow your Python scripts to access the token as an environment variable, maintaining the confidentiality of your credentials while your code interacts with the Replicate API.Installation
Once our project structure is in place, the next step is to install the necessary Python packages that will empower us to perform age transformation. The primary package we need is the Replicate SDK, which offers a user-friendly interface for interacting with deepfake models.
To install the Replicate SDK, you'll want to open the terminal within VS Code or your preferred command-line interface and execute the following pip command:
pip install replicate
This command will download and install the Replicate SDK, integrating it into your Python environment. The SDK simplifies the process of sending requests to and receiving responses from the deepfake model hosted by Replicate, making our development process smoother and more efficient. With this SDK, we can focus on crafting our age transformation logic rather than handling the intricacies of API communication.
The subsequent package we need to incorporate into our project is python-dotenv. This package would be used in accessing environment variables within our Python application. It enables us to load the variables defined in the .env file into our project, thus allowing us to utilize sensitive data such as API keys securely without hardcoding them into our source code.
To install python-dotenv, you can run the following command in your terminal or command prompt:
pip install python-dotenv
By executing this command, python-dotenv will be installed and made available for use in our project. Once set up, we can effortlessly retrieve the REPLICATE_API_TOKEN we stored earlier and use it safely within our application. This not only adheres to best practices for security but also ensures that our application remains flexible and our credentials private.
Implementation of Deep-Fake model
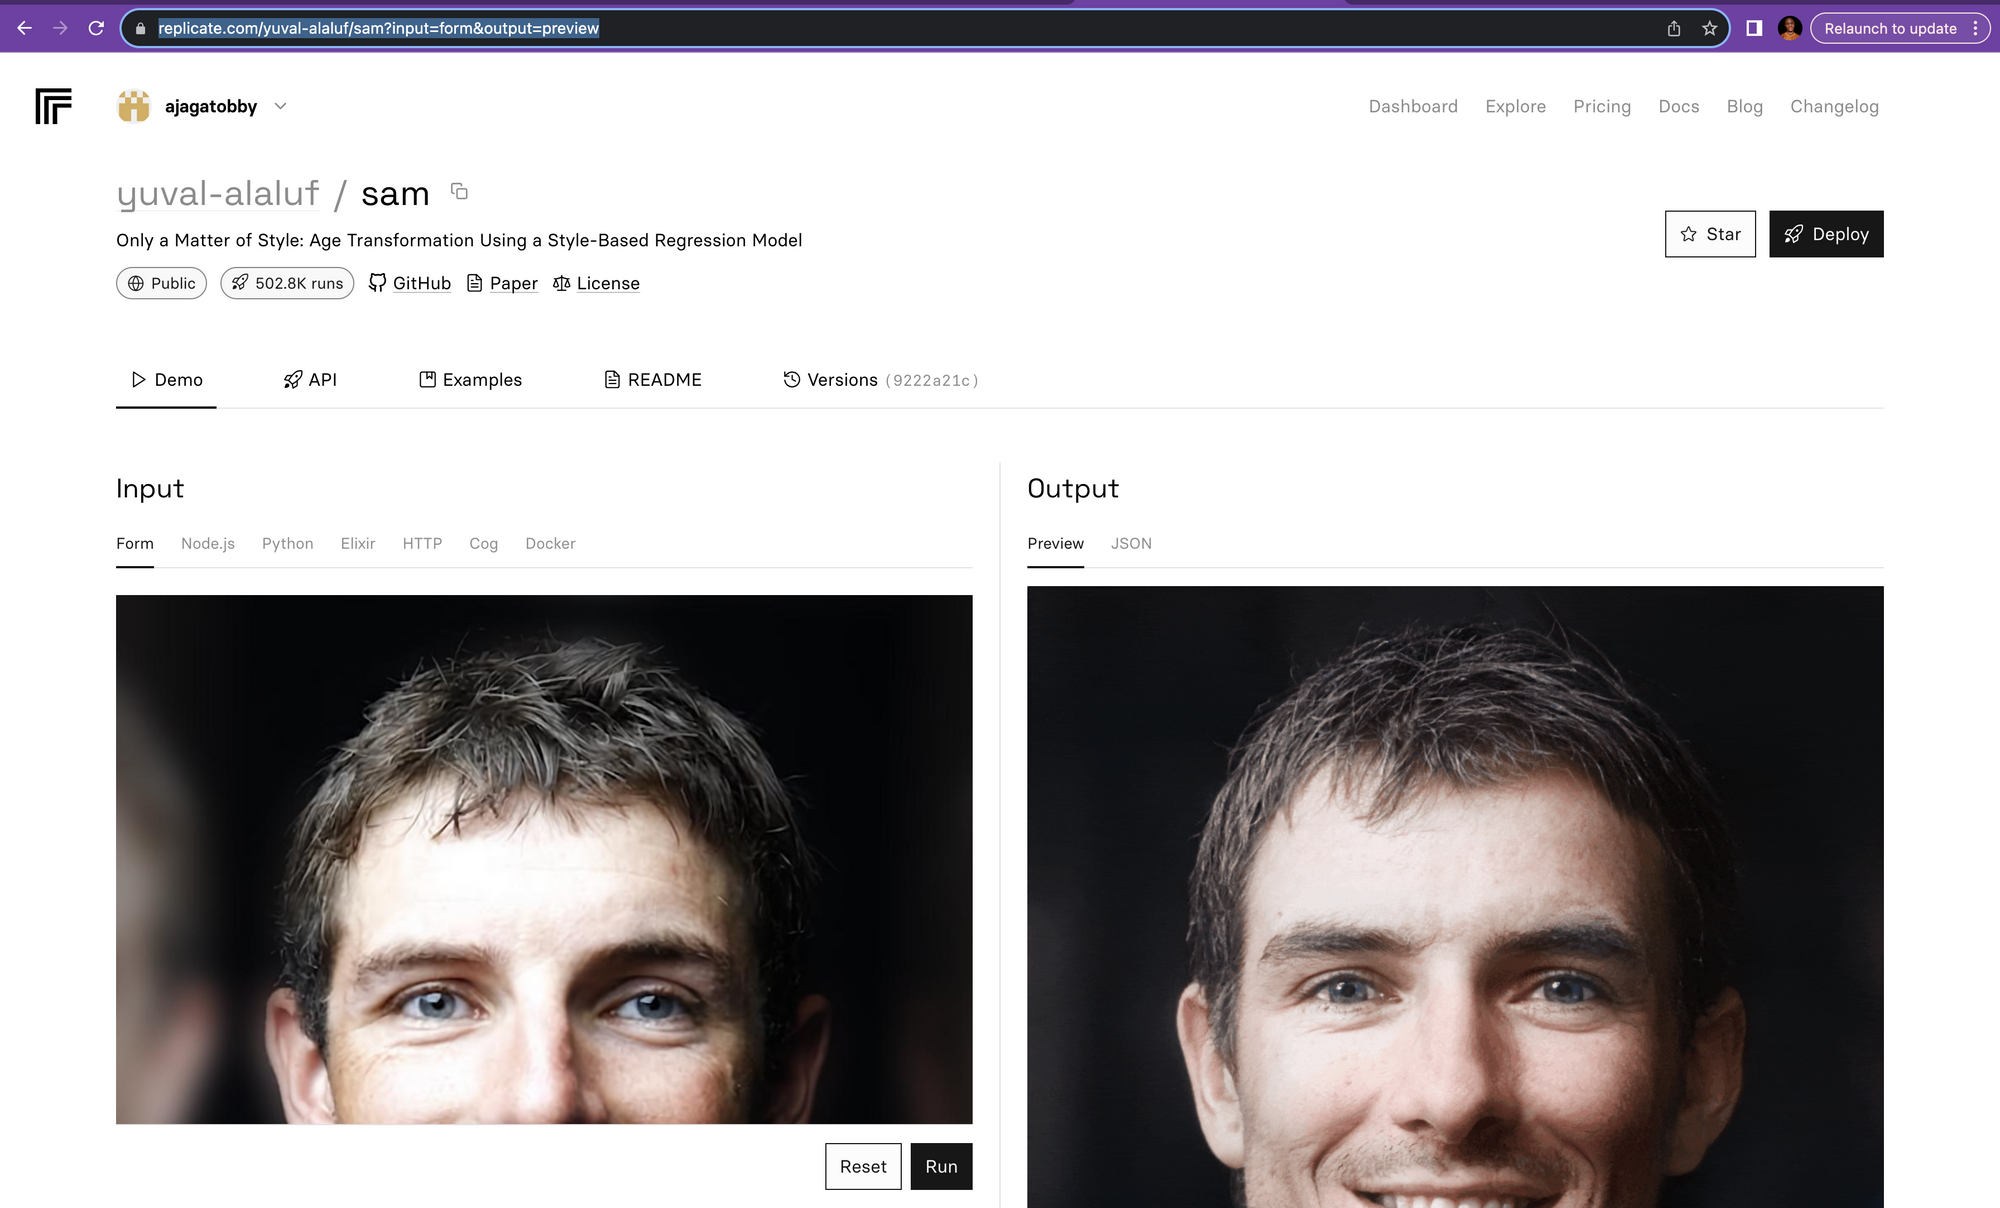
To begin, our initial step is to visit the Replicate website and locate the specific model we intend to use. You can do this by entering the URL https://replicate.com/yuval-alaluf/sam directly into your web browser's address bar. This link will take you to the preview page of the model named 'SAM' created by Yuval Alaluf on Replicate's platform.
On this page, you can find various details about the model, including an overview of its functionality, input requirements, and output examples. It's a valuable resource for understanding how the model operates and what kind of results you can expect when integrating it into your age transformation project.
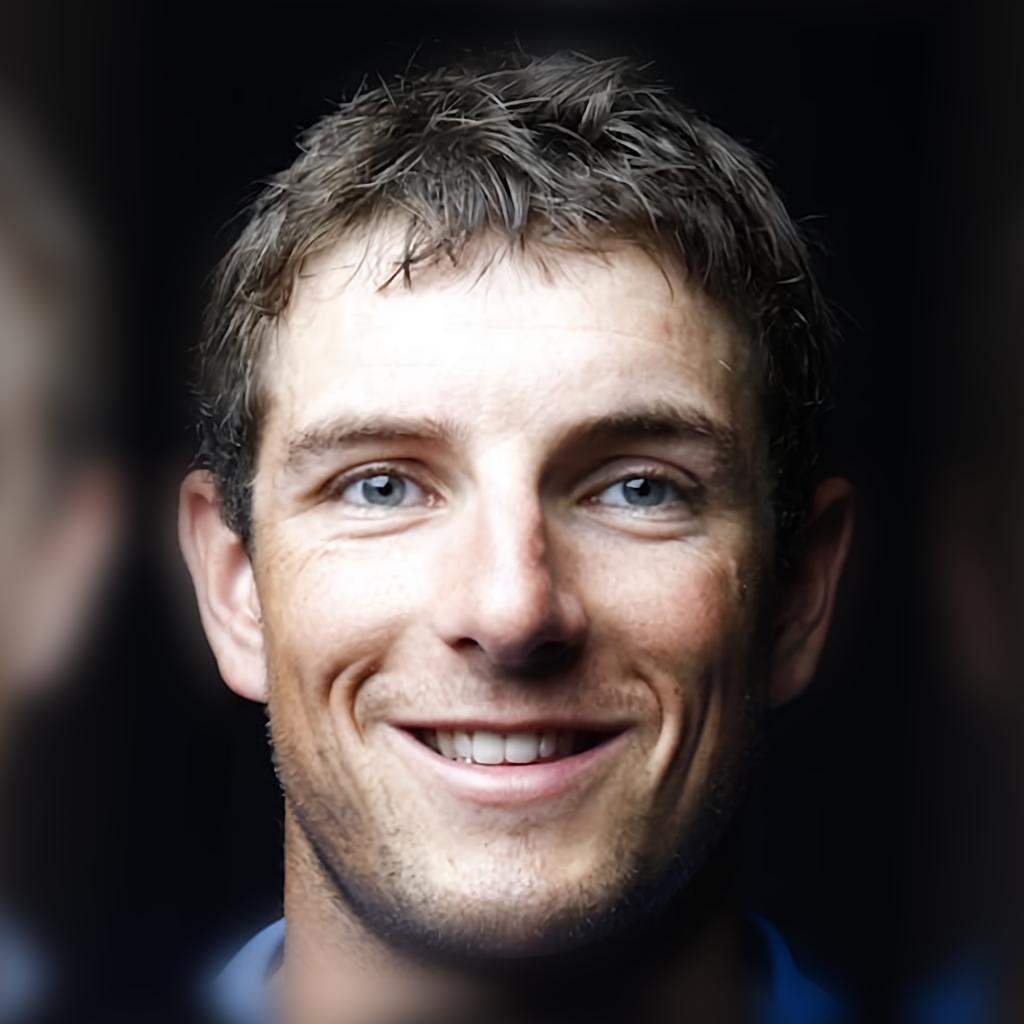
Having successfully installed the Replicate SDK, we're ready to move on to implementing age transformation. Keep in mind, for the transformation process, you will require a reference image. This image will serve as the baseline upon which the age alteration will be applied. You have the option to utilize an example image provided by the model for demonstration purposes, or you can use a personal image of your choice.
To proceed with the age transformation, ensure that your reference image is readily accessible. In the case that you opt to use the model's example image, you may typically find it on the model's page on Replicate, often accompanied by usage instructions and expected outcomes. This can be particularly helpful for understanding how the model interprets input and generates output. If you're using your own image, make sure it meets the model's input criteria for the best results.
Codebase and Explanation
import os
from dotenv import load_dotenv
import replicate


load_dotenv()

output = replicate.run(
    "yuval-alaluf/sam:9222a21c181b707209ef12b5e0d7e94c994b58f01c7b2fec075d2e892362f13c",
    input={
        "image": open("/Users/macbook/workspace/tutorial/project/sample.jpeg", "rb"),
        "target_age": "5"
    }
)
print(output)
This Python script performs an age transformation on an image by using the Replicate SDK and the SAM model developed by Yuval Alaluf. Here's a step-by-step explanation of the code:
import os: This line imports theosmodule, which provides a way to use operating system dependent functionality like reading or writing to the filesystem.from dotenv import load_dotenv: Imports theload_dotenvfunction from thedotenvpackage, which is used to load environment variables from a.envfile into the environment.import replicate: This imports the Replicate package, allowing you to use the Replicate API within your Python script.load_dotenv(): This function call reads the.envfile and loads the variables defined there into the environment. This is typically used to load secrets or configuration settings that you don't want to include directly in your code.
output = replicate.run(...): This is a function call to replicate.run, which runs a model hosted on Replicate. It takes two arguments:
- The first argument is the specific version of the model to run, identified by a unique hash. In this case, it's the SAM model by Yuval Alaluf.
- The second argument is a dictionary representing the input to the model. It contains:
- An image file that is opened in binary read mode. The path to the image file is specified (
/Users/macbook/workspace/tutorial/project/sample.jpeg), which should be replaced with the path to the image you want to transform. - The
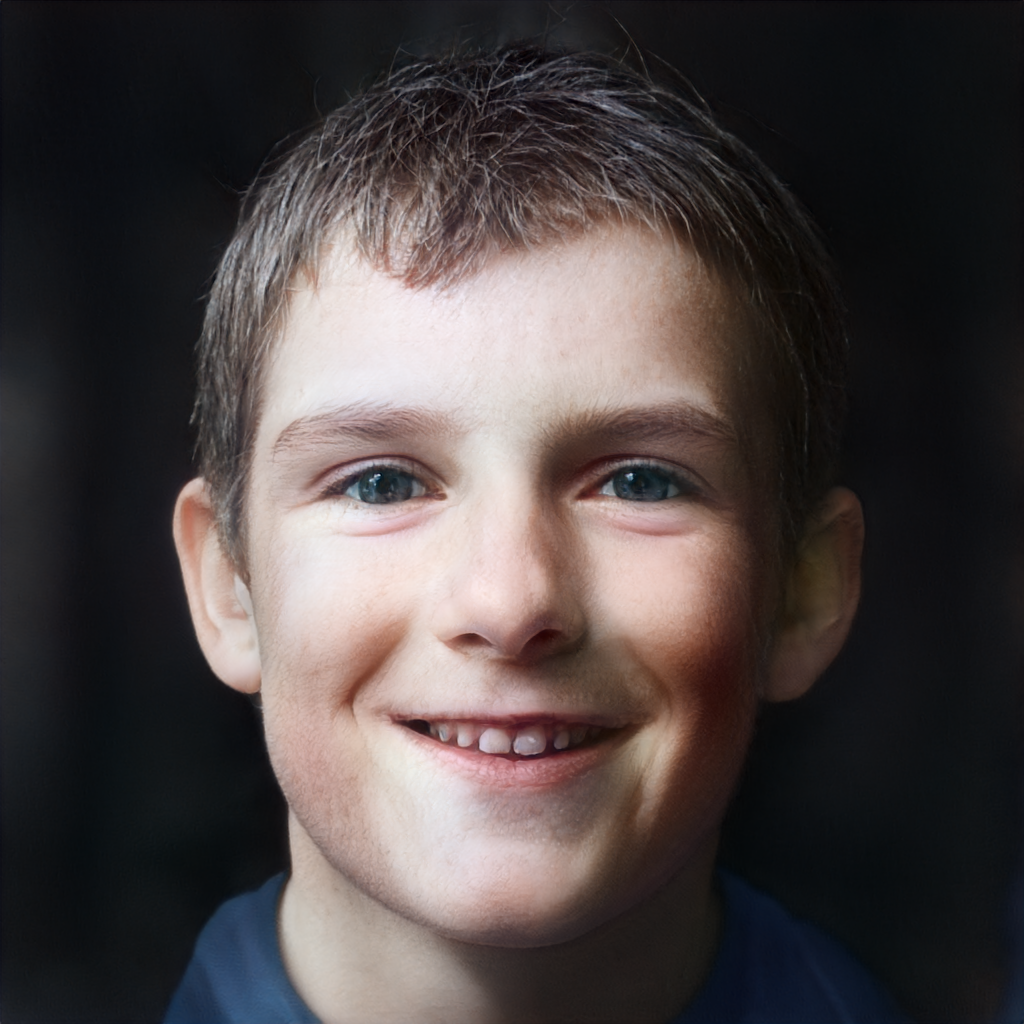
target_ageis set to"5", indicating that you want to transform the age of the person in the image to appear as if they were 5 years old.
print(output): Finally, the script prints out the result of thereplicate.runfunction. The output will typically include a URL to the transformed image, which you can then view or download.
It's important to note that the target_age parameter should be adjusted according to the desired age transformation. Additionally, the model hash ("yuval-alaluf/sam:9222a21c...") is specific to a version of the model; if Replicate updates the model, this hash may change, and you would need to use the new one.
Output
In conclusion
As we wrap up our exploration of age transformation through the power of Python and deep learning, we stand at the intersection of technology and imagination. Today, we've witnessed how a blend of code, algorithms, and creativity can challenge the very notion of time's effect on the human visage. By harnessing the Replicate API and the remarkable SAM model, we've unlocked the ability to reimagine ourselves across the spectrum of years, in mere moments.
This journey has not only introduced us to the technical steps required to achieve such digital alchemy but also prompted us to reflect on the profound implications of this technology. From rekindling memories by rejuvenating old photographs to aiding in important forensic work, the applications are as diverse as they are impactful.
However, with great power comes great responsibility. As we continue to innovate and integrate these tools into various aspects of our digital lives, we must tread thoughtfully, considering privacy, ethics, and authenticity.
Thank you for joining me in this fascinating foray into the future of age transformation. Whether you're a seasoned developer, an enthusiastic hobbyist, or simply a curious mind, I hope this blog has sparked your imagination and opened new vistas of what's possible when technology meets human curiosity. Until our next tech adventure—keep exploring, keep learning, and keep pushing the boundaries of what you thought was possible.
I invite you to watch our informative video on YouTube, where we delve deeper into this topic. Don't miss out on our upcoming enriching content – make sure to hit the subscribe button and turn on notifications. Your support helps us to keep bringing you more amazing insights and tutorials!